By Sefhi and Archlams | Published: May 12, 2026 | Updated: Jul 08, 2026
When I started to play Sword x Staff in the Chinese server, I decided to go with a support character since it’s a playstyle I tend to enjoy in MMO games.
Funny enough, Sages are not only supports, but have the most variety of builds available in the game, so let’s talk about some of the builds you can run for PVE content with this class.
Sage strengths & weaknesses
The most versatile class thanks to the amount of different playstyles available to use
The only class with multiple sources of healing and resurrection, which is really helpful as harder dungeon levels unlock
Even while scaling with HP, it's still a squishy class just like normal Sorcs and cannot be a tank at high co-op level content
Some playstyles take a month+ to unlock, since Summoner and Erosion based builds don't fully unlock until T3
Experiment with builds!
Remember these are just boilerplates to change based on your gear, playstyle, skills and Fantomons.
Best stats
Since there are multiple ways of playing Sage, there are also multiple ways of where to focus your stats and what gears works best for you.
For support units: Max HP takes priority if you want to stay competitive as a healer. ALL HEALS SCALE WITH CASTER’S MAX HP, so it’s mandatory you focus on this stat first.
For DoT damage: Erosion is a debuff, so you need Effect Hit Rate to make sure you can consistently apply as many stacks as possible on the enemies. Crit DMG/Rate is also really good here to scale your damage even further.
For summons: They inherit a portion of your stats, so focus on Elemental Mastery, Crit Rate/Damage, ATK and SPD.
Erosion is also Dark DMG, so do not forget about ATK and Elemental Mastery when picking substats to properly scale your damage.
Fantomons
In the case of Sages, it’s better to focus on Aegiswing thanks to the survivability and healing it provides in high difficulty content.
Mandragora is a great option until you get enough currency to exchange for Aegiswing or for some extra healing output when personal safety is not the issue (only guild expedition so far).
Lower level dungeons could be a possible other option, but you’re better off going for more damage there.
If you are planning on saving resources, other Mythical pets will take a while to release:
Pandarial (mostly for DPS sages) releases at the end of Season 2
Prismora (purely a healer pet) releases mid Season 3
Calculate based on your server start date if it’s worth saving for one or the other, since each season lasts around 2 months.
Companions
Companions give passive stats at specific levels, so we recommend focusing on a few until level 50 that benefit your class directly before you level up all of them.
ALL CLASSES benefit from DMG Boost and Reduction stats to both increase damage and survivability.
For healers Aqua, Suimo and Suzu all increase Healing Boost% at level 100.
Gems
Gem tiers
I’m going to use T10 gems as a reference, but the higher the tier, the better the stats they provide. Gems go from T1 to T15.
For sages there are a few options you can pick from:
T10 ObsidianT10 ObsidianDescriptionInlay gear with it to amplify your ATK and DMG Boost.
is good on any class, since everyone benefits from more damage regardless of what playstyle they have.
T10 MoonstoneT10 MoonstoneDescriptionInlay gear with it to amplify your DEF and DMG RES.
is also pretty popular for all classes to help increase their survivability.
If you are a healer,
T10 AmberT10 AmberDescriptionInlay gear with it to amplify your HP and Healing Boost.
and
T10 BerylT10 BerylDescriptionInlay gear with it to amplify your HP.
are the best options since they will scale both HP and Healing.
Summoner and Erosion based builds can run either
T10 ObsidianT10 ObsidianDescriptionInlay gear with it to amplify your ATK and DMG Boost.
or the less popular
T10 RubyT10 RubyDescriptionInlay gear with it to amplify your ATK.
.
Builds
Early on the game does not have many available builds since you are limited by the amount of spells you can get.
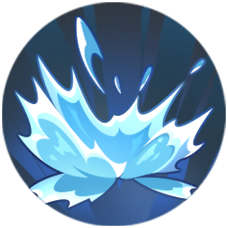
Most people will play elemental damage builds in this stage, with water being the most popular thanks to
Water AssaultWater AssaultMageTechniqueAttackDescriptionDeals Water DMG once to all enemies in a 3×4 grid area in front of the caster. DMG decreases by 25% for each subsequent hit on the same target. (Large targets may take multiple hits.)
and
Water to IceWater to IceMageCharmAttackAbnormalDebuffDescriptionWhen the caster's Technique deals Water DMG to an enemy, there's a 50% chance to trigger Condensation, dealing additional Water DMG once, with a 30% base chance to inflict Frozen for 1 turn.
.
Summoners are really bad this early on, wait for at least T2 for that.
Techniques
Water Assault
Wind's Delight
Water Shot
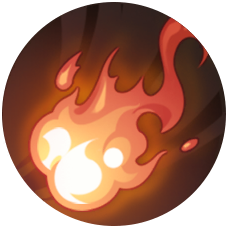
Fireball
Charms
Water to Ice
Mana Surge
Unstable Aura
Elemental Mystery
Summoned Unit Skills
Squishy build but highest damage output on most situations.
I’ve had great results running both
FireballFireballMageTechniqueAttackDescriptionSelects a grid within 5 grids of the caster. Deals Fire DMG once to all enemies within a 1-grid square area of the target grid.
and
Water ShotWater ShotMageTechniqueAttackDescriptionDeals Water DMG once to 1 enemy within 4 grids of the caster.
(previously I was using
Blazing Fire RingBlazing Fire RingMageTechniqueAttackDescriptionDeals Fire DMG once to all enemies within 2 grids of the caster.
instead).
The rest of the spells have great synergy with
Unstable AuraUnstable AuraMageCharmAttackRepelDescriptionWhen the caster's Technique deals DMG to an enemy, there's a 25% chance to trigger Aura, dealing additional Wind DMG once, with a 60% base chance to knock them back by 1 grid.
since they’re either AoE or multiple projectiles.
Mana SurgeMana SurgeMageCharmPropDescriptionIncreases the caster's Crit Rate.
makes the build deal a lot more damage, but if you are dying a lot, you can swap to
Gale ShieldGale ShieldMageCharmShieldRepelDescriptionGrants a shield based on the caster's max HP before battle starts. When the shield disappears, deals Wind DMG once to all enemies within a 1-grid square area of the caster, with a 100% base chance to knock them back by 1 grid.
instead.
Techniques
Tempest Sphere
Wind's Delight
Flame Jet
Water Shot
Charms
Unstable Aura
Mana Surge
Elemental Mystery
Gale Shield
Summoned Unit Skills
Great single target damage thanks to having so many different projectiles and damage instances that can proc
Unstable AuraUnstable AuraMageCharmAttackRepelDescriptionWhen the caster's Technique deals DMG to an enemy, there's a 25% chance to trigger Aura, dealing additional Wind DMG once, with a 60% base chance to knock them back by 1 grid.
.
Even the skills that “lose” damage if they hit the same target work super well here, since you have so many chances for
Unstable AuraUnstable AuraMageCharmAttackRepelDescriptionWhen the caster's Technique deals DMG to an enemy, there's a 25% chance to trigger Aura, dealing additional Wind DMG once, with a 60% base chance to knock them back by 1 grid.
to deal extra damage and make up for it.
Water ShotWater ShotMageTechniqueAttackDescriptionDeals Water DMG once to 1 enemy within 4 grids of the caster.
can be switched with any spell here honestly, either single target or multiple projectiles for extra damage.
Techniques
Water Assault
Water Shot
Ice Spike
Charms
Unstable Aura
Mana Surge
Dew's Blessing
Water to Ice
Summoned Unit Skills
Great for bosses to freeze them (makes the boss skip a turn and after depleting the stamina bar, they take more damage).
Last spell depends on the boss, great options are
Flame JetFlame JetMageTechniqueAttackDescriptionDeals Fire DMG 3 times to all enemies in a 1×3 grid area in front of the caster.
or any of the multi projectile wind spells like
Tempest SphereTempest SphereMageTechniqueAttackDescriptionDeals Wind DMG 5 times to 1 enemy within 3 to 5 grids of the caster.
.
We still run
Unstable AuraUnstable AuraMageCharmAttackRepelDescriptionWhen the caster's Technique deals DMG to an enemy, there's a 25% chance to trigger Aura, dealing additional Wind DMG once, with a 60% base chance to knock them back by 1 grid.
since at tier 1 is one of the strongest passives paired with
Mana SurgeMana SurgeMageCharmPropDescriptionIncreases the caster's Crit Rate.
for less crit RNG.
Here is where a lot more builds will finally open up.
You can go full support, or switch to summoner, or maybe go for debuff and Dark DMG. You can also combine all of them for hybrid playstyles.
The problem is that you lack full loadouts for each specialization, so I would recommend going for a hybrid approach until Tier 3.
Techniques
Dark Bullet
Shadow Impact
Weakening Hex
Flame Wolf Summon
Charms
Shadow Erosion
Soul Impact
Insight
Elemental Mystery
Summoned Unit Skills
Considering you cannot go full Erosion nor summoner yet, I’ve found the best build so far for Tier 2 is going for a hybrid build combining Dark DMG with your
Flame Wolf SummonFlame Wolf SummonSageTechniqueSummonAttackDescriptionSummons 2 Flame Wolves in front of the caster that immediately acts. The summon inherits a percentage of the caster's stats, starts in Stealth, and remains for up to 2 turns. (Zero Initial CD)
.
Main focus remains Dark DMG using both
Shadow ErosionShadow ErosionSageCharmDebuffAttackDescriptionEach time the caster's Technique deals Dark DMG to an enemy, there is a 40% base chance to inflict Erosion.
and
Soul ImpactSoul ImpactSageCharmAttackDescriptionWhen the caster's summon dies or expires, deals Dark DMG once to all enemies within 2 grids of it.
, so make sure you have enough Effect Hit Rate to apply Erosion consistently.
If you have issues surviving, you can switch to
Gale ShieldGale ShieldMageCharmShieldRepelDescriptionGrants a shield based on the caster's max HP before battle starts. When the shield disappears, deals Wind DMG once to all enemies within a 1-grid square area of the caster, with a 100% base chance to knock them back by 1 grid.
instead and remove either
InsightInsightMageCharmPropDescriptionIncreases the caster's Effect Hit Rate.
or
Elemental MysteryElemental MysteryMageCharmPropDescriptionIncreases the caster's Elemental Mastery.
.
Techniques
Healing Touch
Void Blessing
Radiant Restoration
Iron Thorn
Charms
Healing Mastery
Resurrection
Tough Soul
Gale Shield
Summoned Unit Skills
Now you start feeling like a proper healer.
Radiant RestorationRadiant RestorationSageTechniqueFriendCureDescriptionHeals all allies within 4 grids of the caster once.
will be your main skill for a while if that’s your playstyle, so make sure you stack up as much HP as possible.
We also unlock two powerful charms for healers,
ResurrectionResurrectionSageCharmFriendBackToLifeBuffCureDescriptionWhen an allied adventurer dies, immediately revives and heals them once, granting Revitalization for 2 turns (cannot be dispelled). This Charm can only trigger once per battle. Before battle starts, if multiple allied adventurers are dead, reviving the one with the highest Power first.
and
Healing MasteryHealing MasterySageCharmPropDescriptionEnhances the caster's healing effects.
.
We use
Iron ThornIron ThornMageTechniqueAttackAbnormalDebuffDescriptionSelects a grid within 3 grids of the caster. Deals Wind DMG once to all enemies within 1 grid of the target grid, with a 30% base chance to inflict Immobilize for 1 turn.
to provide more utility for the team thanks to the Immobilize debuff, but you can switch this for another spell if you want more damage.
What about summons?
Summoner spells are not that great even at Tier 3, so we are not recommending a pure build on that specialization.
If you like summons, make a hybrid build with the recommendations below.
The builds become more “pure” here since you can run full specializations, or you can stick to hybrid builds, that works too.
Techniques
Mana Blast
Abyssal Hand
Shadow of Termination
Charms
Shadow Erosion
Linked Misfortune
Shadow Vengeance
Night's Blessing
Summoned Unit Skills
T3 Erosion builds are pretty good and can actually deal serious damage. You can go full AoE or instead aim for more single target damage.
Linked MisfortuneLinked MisfortuneArcanistCharmDebuffAttackDescriptionEach time the caster inflicts Erosion on an enemy, there's a 60% chance to inflict Erosion again.
and
Night's BlessingNight's BlessingArcanistCharmPropDescriptionIncreases the caster's Dark DMG.
increase our damage, while
Shadow VengeanceShadow VengeanceArcanistCharmBackToLifeBuffDescriptionUpon taking lethal DMG for the first time, the caster survives with 1 HP and enters Shadow Form, lasting until the end of the caster's turn (up to 4 global turns). The effect cannot be dispelled. In this form, the caster is immune to all DMG, can't be healed, won't be the primary target of attacks, deals increased DMG, and reduces Technique CD by 2 turns. (The caster dies immediately if failing to win when Shadow Form ends, ignoring any effects that would preserve HP.)
lets you cheat death for 1 turn and deal huge damage before dying.
Make sure
Shadow of TerminationShadow of TerminationArcanistTechniqueAttackDescriptionDeals Dark DMG once to 1 enemy within 3 grids of the caster. If the target carries Erosion, triggers all Erosion stacks immediately. (Prioritizes large targets)
is used last always, since you want to stack as many Erosion stacks as possible before using it.
Even at T3, it’s still worth running
Mana SurgeMana SurgeMageCharmPropDescriptionIncreases the caster's Crit Rate.
if your gear substats are not good yet.
Single target damage:
Dark BulletDark BulletSageTechniqueAttackDebuffDescriptionAttacks 1 enemy within 4 grids of the caster, dealing Dark DMG once, with a 50% base chance to inflict Erosion.
remains the choice until future tiers.
AoE: You can use
Weakening HexWeakening HexSageTechniqueAttackDebuffDescriptionSelects a grid within 3 grids of the caster. Deals Dark DMG once to all enemies within 2 grids of the target grid, with a 50% base chance to inflict Weakened 1 for 2 turns.
or
Shadow ImpactShadow ImpactSageTechniqueAttackDescriptionSelects a grid within 3 grids of the caster. Deals Dark DMG once to all enemies within 2 grids of that target grid. If the enemy target carries Erosion, triggers Erosion effect twice immediately.
, both great options.
Techniques
Healing Touch
Void Blessing
Radiant Restoration
Waterling Summon
Charms
Healing Mastery
Resurrection
Shadow Vengeance
Overhealing
Summoned Unit Skills
Our new summon
Waterling SummonWaterling SummonArcanistTechniqueSummonCureDisperseStatusDescriptionSummons 1 Waterling behind the caster that immediately acts. The summon inherits a percentage of the caster's stats, starts in Stealth, and remains for up to 5 turns. (Zero Initial CD)
has two skills to heal our allies, while the new passive
OverhealingOverhealingArcanistCharmCureDescriptionHas a 30% chance to additionally heal all allies within 1 grid of the target each time the caster heals allies with a Technique.
increases our healing output significantly.
You could replace
Healing TouchHealing TouchMageTechniqueFriendCureDisperseStatusDescriptionHeals 1 ally within 5 grids of the caster once and dispels 1 random ailment or debuff from them.
with
Frenzy TotemFrenzy TotemArcanistTechniqueSummonBuffDescriptionSummons 1 Totem in front of the caster that immediately acts. The summon inherits a percentage of the caster's stats, starts in Stealth, and remains for up to 5 turns. (Zero Initial CD)
but you do lose one of the only two healing skills available.
It’s also important to note that running 4 support charms means you have no
Gale ShieldGale ShieldMageCharmShieldRepelDescriptionGrants a shield based on the caster's max HP before battle starts. When the shield disappears, deals Wind DMG once to all enemies within a 1-grid square area of the caster, with a 100% base chance to knock them back by 1 grid.
or any defensive mechanism to help you if your skills are on a cooldown.
To mitigate this, we run
Shadow VengeanceShadow VengeanceArcanistCharmBackToLifeBuffDescriptionUpon taking lethal DMG for the first time, the caster survives with 1 HP and enters Shadow Form, lasting until the end of the caster's turn (up to 4 global turns). The effect cannot be dispelled. In this form, the caster is immune to all DMG, can't be healed, won't be the primary target of attacks, deals increased DMG, and reduces Technique CD by 2 turns. (The caster dies immediately if failing to win when Shadow Form ends, ignoring any effects that would preserve HP.)
as a “last resort”, resetting all CDs and healing one extra time / summon our Waterling, then die (the summon will remain active even if you die).
Unless you are in a party with 3 friends, we recommend hybrid builds instead of full support like the build shown above (4 Techniques that deal no damage).
Techniques
Healing Touch
Frenzy Totem
Weakening Hex
Dark Bullet
Charms
Healing Mastery
Shadow Erosion
Insight
Overhealing
Summoned Unit Skills
You can use this build to boost your party damage for specific events where damage is calculated individually, but buffs still apply if you are in a group, making it easier to get better scores with your friends.
Frenzy TotemFrenzy TotemArcanistTechniqueSummonBuffDescriptionSummons 1 Totem in front of the caster that immediately acts. The summon inherits a percentage of the caster's stats, starts in Stealth, and remains for up to 5 turns. (Zero Initial CD)
and
Weakening HexWeakening HexSageTechniqueAttackDebuffDescriptionSelects a grid within 3 grids of the caster. Deals Dark DMG once to all enemies within 2 grids of the target grid, with a 50% base chance to inflict Weakened 1 for 2 turns.
do most of the job here, and we recommend using a Fantomon like Chomusuke or Nyxarchon that can also reduce enemy defense.
Charms do not matter as much here, so we can run
InsightInsightMageCharmPropDescriptionIncreases the caster's Effect Hit Rate.
to make it easier to apply debuffs with some extra healing charms.
Disclaimer
All testing was conducted on a single ~f2p account with it’s own charm & techniques rarities, your personal situation and results may differ.
In most situations, unless we talk about pure support builds, two erosion passives (
Shadow ErosionShadow ErosionSageCharmDebuffAttackDescriptionEach time the caster's Technique deals Dark DMG to an enemy, there is a 40% base chance to inflict Erosion.
and
Linked MisfortuneLinked MisfortuneArcanistCharmDebuffAttackDescriptionEach time the caster inflicts Erosion on an enemy, there's a 60% chance to inflict Erosion again.
) are still mandatory, that leaves us with two charm slots.
For reference, this was tested against single target boss, on difficulty 2/3:
Soul Pact ResonanceSoul Pact ResonanceDominatorCharmSummonBuffDescriptionGrants an ATK boost when the caster has a summon on the battlefield.
100%
Mantra of BlessingsMantra of BlessingsDominatorCharmFriendBuffDescriptionAt the start of the caster's turn, grants Blessing to the allied character with the highest ATK, increasing their DMG. This effect lasts until the start of the caster's next turn and cannot be dispelled.
83.4%
Mana SurgeMana SurgeMageCharmPropDescriptionIncreases the caster's Crit Rate.
78.4%
Night's BlessingNight's BlessingArcanistCharmPropDescriptionIncreases the caster's Dark DMG.
78.1%
Falling Dark StarFalling Dark StarDominatorCharmBuffDescriptionAt the start of the caster's turn, the caster gains 1 random buff that lasts until the start of the caster's next turn.
76.4%
Soul Pact ResonanceSoul Pact ResonanceDominatorCharmSummonBuffDescriptionGrants an ATK boost when the caster has a summon on the battlefield.
is a clear winner, but it requires you to have a summon out at all times, so it has two drawbacks:
You lose one dark damage spell to it, but the damage boost it provides slightly outweights the loss on lower ranks, and will have a clear advantage on higher ranks
It’s only viable for stages where your summon can survive, which is determined both by stage difficulty, presence of enemy AoE attacks and your summon HP (skill rank investment)
Mantra of BlessingsMantra of BlessingsDominatorCharmFriendBuffDescriptionAt the start of the caster's turn, grants Blessing to the allied character with the highest ATK, increasing their DMG. This effect lasts until the start of the caster's next turn and cannot be dispelled.
got second place, but it has it’s own pitfalls as well:
It only applies to the player entity with highest ATK on field, which isn’t that much of an issue - you’re still contributing damage to the clear, unless the highest ATK player in your squad is a healer/tank.
Only the highest ranked
Mantra of BlessingsMantra of BlessingsDominatorCharmFriendBuffDescriptionAt the start of the caster's turn, grants Blessing to the allied character with the highest ATK, increasing their DMG. This effect lasts until the start of the caster's next turn and cannot be dispelled.
is applied, making it a wasted slot should two sages bring it in.
These drawbacks does not apply to solo content, as you’ll always be the highest ATK player.
Mana SurgeMana SurgeMageCharmPropDescriptionIncreases the caster's Crit Rate.
and
Night's BlessingNight's BlessingArcanistCharmPropDescriptionIncreases the caster's Dark DMG.
follow right behind with the gap between them being within the margin of error.
Falling Dark StarFalling Dark StarDominatorCharmBuffDescriptionAt the start of the caster's turn, the caster gains 1 random buff that lasts until the start of the caster's next turn.
appears to follow closely behind them, but only if you consider the median - it has the widest RNG gap out of all the options we have.
It’s higest output is comparable to
Mana SurgeMana SurgeMageCharmPropDescriptionIncreases the caster's Crit Rate.
and
Night's BlessingNight's BlessingArcanistCharmPropDescriptionIncreases the caster's Dark DMG.
, it’s median is only slightly behind, while it’s lowest is abysmal.
With that said, it may be a decent pick for competitive whale Dominators (who should’ve switched to Conqueror anyway) to get first move SPD advantage 33% of time (with other two options being decent enough as well).
On this tier we also got
AberrancyAberrancyDominatorCharmDescriptionWhen taking DMG, if the attacker is affected by ailment or debuff, reduces DMG taken by the caster.
- a strictly defensive option, that has no place in Arena burst builds or single target builds (since
Shadow of TerminationShadow of TerminationArcanistTechniqueAttackDescriptionDeals Dark DMG once to 1 enemy within 3 grids of the caster. If the target carries Erosion, triggers all Erosion stacks immediately. (Prioritizes large targets)
will clear all erosion stacks off the enemy), but might be a decent pick for AoE and Tournament scenarios.
Every damage build in the list can benefit from Nyxarchon (or Pandarial later this season), so if you chose it over Aegiswing - use it instead.
For dungeons, your team may have higher clear success if you slot
ResurrectionResurrectionSageCharmFriendBackToLifeBuffCureDescriptionWhen an allied adventurer dies, immediately revives and heals them once, granting Revitalization for 2 turns (cannot be dispelled). This Charm can only trigger once per battle. Before battle starts, if multiple allied adventurers are dead, reviving the one with the highest Power first.
as one of your charms, even tho your personal damage will suffer for it.
You’ll have to weight yourself what is more valuable to you personally: higher consistency of S dungeon clears, or higher recount position on A dungeon clears.
There are several Single Target builds you can go for depending on the situation. First would be the Treantling Soul Pact:
Techniques
Treantling Summon
Dark Starburst
Dark Bullet
Shadow of Termination
Charms
Linked Misfortune
Shadow Erosion
Mantra of Blessings
Soul Pact Resonance
Summoned Unit Skills
As mentioned before, this build is only viable for stages where your Treantling can survive for full duration.
Treantling goes into the first slot, while
Shadow of TerminationShadow of TerminationArcanistTechniqueAttackDescriptionDeals Dark DMG once to 1 enemy within 3 grids of the caster. If the target carries Erosion, triggers all Erosion stacks immediately. (Prioritizes large targets)
goes into the least, for obvious reasons.
Make sure your Mantra of Blessing is not wasted.
Switching Treantling to Waterling will lower the damage output to SoulPactless builds, while providing some non-existant healing, unless you sacrifice even more of your damage for some Healing Bonus %.
Second build will be pure erosion build for stages, where
Soul Pact ResonanceSoul Pact ResonanceDominatorCharmSummonBuffDescriptionGrants an ATK boost when the caster has a summon on the battlefield.
doesn’t have 100% uptime.
Techniques
Mana Blast
Dark Starburst
Dark Bullet
Shadow of Termination
Charms
Linked Misfortune
Shadow Erosion
Mantra of Blessings
Night's Blessing
Summoned Unit Skills
A slight variation will be replacing
Night's BlessingNight's BlessingArcanistCharmPropDescriptionIncreases the caster's Dark DMG.
for
Shadow VengeanceShadow VengeanceArcanistCharmBackToLifeBuffDescriptionUpon taking lethal DMG for the first time, the caster survives with 1 HP and enters Shadow Form, lasting until the end of the caster's turn (up to 4 global turns). The effect cannot be dispelled. In this form, the caster is immune to all DMG, can't be healed, won't be the primary target of attacks, deals increased DMG, and reduces Technique CD by 2 turns. (The caster dies immediately if failing to win when Shadow Form ends, ignoring any effects that would preserve HP.)
, if all you need to clear is that final push.
Techniques
Mana Blast
Dark Starburst
Dark Bullet
Shadow Impact
Charms
Linked Misfortune
Shadow Erosion
Mantra of Blessings
Aberrancy
Summoned Unit Skills
For AoE combat dominator can go with good old Erosion build with only a couple new charms to choose from.
Wide application of debuffs lets us use
AberrancyAberrancyDominatorCharmDescriptionWhen taking DMG, if the attacker is affected by ailment or debuff, reduces DMG taken by the caster.
for slightly higher survivability.
Healing builds will have the most variation out of all of them. The baseline we’ll take will be the pure healing build with
Mantra of BlessingsMantra of BlessingsDominatorCharmFriendBuffDescriptionAt the start of the caster's turn, grants Blessing to the allied character with the highest ATK, increasing their DMG. This effect lasts until the start of the caster's next turn and cannot be dispelled.
:
Techniques
Void Blessing
Radiant Restoration
Healing Touch
Rejuvenating Rain
Charms
Phantom Light
Healing Mastery
Overhealing
Mantra of Blessings
Summoned Unit Skills
The double Healing Bonus % charm is an early game consideration, the further we go into the season (and the more Healing Bonus % you get on gear), the lower their prio will become.
If you end up being the highest ATK player on the team (or anyone else brings
Mantra of BlessingsMantra of BlessingsDominatorCharmFriendBuffDescriptionAt the start of the caster's turn, grants Blessing to the allied character with the highest ATK, increasing their DMG. This effect lasts until the start of the caster's next turn and cannot be dispelled.
along), consider switch out
Mantra of BlessingsMantra of BlessingsDominatorCharmFriendBuffDescriptionAt the start of the caster's turn, grants Blessing to the allied character with the highest ATK, increasing their DMG. This effect lasts until the start of the caster's next turn and cannot be dispelled.
for either
ResurrectionResurrectionSageCharmFriendBackToLifeBuffCureDescriptionWhen an allied adventurer dies, immediately revives and heals them once, granting Revitalization for 2 turns (cannot be dispelled). This Charm can only trigger once per battle. Before battle starts, if multiple allied adventurers are dead, reviving the one with the highest Power first.
or even
Falling Dark StarFalling Dark StarDominatorCharmBuffDescriptionAt the start of the caster's turn, the caster gains 1 random buff that lasts until the start of the caster's next turn.
, which will boost your healing output 67% of the time.
Should survivability of the squad be an issue: switch
Mantra of BlessingsMantra of BlessingsDominatorCharmFriendBuffDescriptionAt the start of the caster's turn, grants Blessing to the allied character with the highest ATK, increasing their DMG. This effect lasts until the start of the caster's next turn and cannot be dispelled.
to
ResurrectionResurrectionSageCharmFriendBackToLifeBuffCureDescriptionWhen an allied adventurer dies, immediately revives and heals them once, granting Revitalization for 2 turns (cannot be dispelled). This Charm can only trigger once per battle. Before battle starts, if multiple allied adventurers are dead, reviving the one with the highest Power first.
.
Should you need extra healing on pass-through stages your squad kills too fast: switch
Healing TouchHealing TouchMageTechniqueFriendCureDisperseStatusDescriptionHeals 1 ally within 5 grids of the caster once and dispels 1 random ailment or debuff from them.
to
Waterling SummonWaterling SummonArcanistTechniqueSummonCureDisperseStatusDescriptionSummons 1 Waterling behind the caster that immediately acts. The summon inherits a percentage of the caster's stats, starts in Stealth, and remains for up to 5 turns. (Zero Initial CD)
- it’s output is inferior, but it has the advantage of Zero Initial CD.
Should your own survivability be an issue: switch Mandragora to Aegiswing, and, if that is not enough,
Mantra of BlessingsMantra of BlessingsDominatorCharmFriendBuffDescriptionAt the start of the caster's turn, grants Blessing to the allied character with the highest ATK, increasing their DMG. This effect lasts until the start of the caster's next turn and cannot be dispelled.
for
Shadow VengeanceShadow VengeanceArcanistCharmBackToLifeBuffDescriptionUpon taking lethal DMG for the first time, the caster survives with 1 HP and enters Shadow Form, lasting until the end of the caster's turn (up to 4 global turns). The effect cannot be dispelled. In this form, the caster is immune to all DMG, can't be healed, won't be the primary target of attacks, deals increased DMG, and reduces Technique CD by 2 turns. (The caster dies immediately if failing to win when Shadow Form ends, ignoring any effects that would preserve HP.)
.
The final build after multiple of such changes may look like this:
Techniques
Void Blessing
Radiant Restoration
Healing Touch
Rejuvenating Rain
Charms
Phantom Light
Healing Mastery
Shadow Vengeance
Resurrection
Summoned Unit Skills
Techniques
Abyssal Hand
Dark Starburst
Dark Bullet
Shadow of Termination
Charms
Linked Misfortune
Shadow Erosion
Mantra of Blessings
Shadow Vengeance
Summoned Unit Skills
There are variations you can go for solo pvp build, even going as far as making a healing hybrid with pitiable damage for prolonged sustain fights.
But the “I don’t want to read that much” build we’ll provide is a simple burst build we already used last season with some new spells mixed in.
This one is mostly for CoH and Chaos Invasion, sacrificing everything to support squad damage output with a sprinkle of healing to keep both players and
Frenzy TotemFrenzy TotemArcanistTechniqueSummonBuffDescriptionSummons 1 Totem in front of the caster that immediately acts. The summon inherits a percentage of the caster's stats, starts in Stealth, and remains for up to 5 turns. (Zero Initial CD)
alive.
Once again, do not use this build outside booster team compositions to help friends with higher damage output.
Techniques
Radiant Restoration
Decoy Clone
Frenzy Totem
Dark Bullet
Charms
Healing Mastery
Overhealing
Phantom Light
Mantra of Blessings
Summoned Unit Skills
Remember to use either Chomusuke or Nyxarchon in this build to further help your team deal more damage thanks to their DEF shred.
Summoner builds have several caveats ranging in their severity (from highest to lowest):
Main caveat of summoner build is how badly the implementation fits into core gameplay - summon damage is balanced around summons surviving for their entire duration, which is a tough call in high-difficulty content.
To increase summon life-expectancy you need to both invest heavily into duping their skills up and build defensive stats (HP, block etc) on your gear beyond your own survival for your summons to inherit, which will eat into your damage potential.
Summoner damage comes in every element, requiring zookeepers to invest in all five affinities;
The mildest disadvantage is how backloaded summon damage is: you need to wait for summon’s entire duration to realise it’s damage potential, while more bursty builds will chip away at enemy count, reducing incoming damage along the way;
A honourable mention should go to the variety: there are not enough summons to fill out your bar (having damage in mind specifically), and with SxS balancing - by the time you get enough, oldest ones will be power crept into the ground.
Made by Sefhisefhi
Settings
Other options
Hide top ad on character pages and guidesSponsors make it possible to work full time on the website, consider leaving this off to support my content.
Disable videos on landing page
Hide character carousels on game pages
Default skill level
Other options
Load Favorite Item (treasures) by default
Show asset icon by default
Reorder character sections
Skills
Skill recommendations
Build
Pros & Cons
Synergies & notes
Raid usage
Default skill level
Reorder character sections
Skills
Skill priority
Yearning (aside)
Recommended artifacts
Foods & A-Club
Skins
Default skill rarity
Other options
Hide skills from the TW serverShow skills available in the global server only.


 Blazing Fire Ring
 Gale Shield